

Search By Square Foot
• Up to 1000 Sq Ft
• 1001 - 1500 Sq Ft
• 1501 - 2000 Sq Ft
• 2001 - 2500 Sq Ft
• 2501 - 3000 Sq Ft
• 3001 - 3500 Sq Ft
• 3501 - 4000 Sq Ft
• 4001 - 4500 Sq Ft
• 4501 - 5000 Sq Ft
• 5001 Sq Ft And Up
Search By Square Foot
• Up to 1000 Sq Ft
• 1001 - 1500 Sq Ft
• 1501 - 2000 Sq Ft
• 2001 - 2500 Sq Ft
• 2501 - 3000 Sq Ft
• 3001 - 3500 Sq Ft
• 3501 - 4000 Sq Ft
• 4001 - 4500 Sq Ft
• 4501 - 5000 Sq Ft
• 5001 Sq Ft And Up
.png)
(1).png)
Use this step-by-step home building guide to be well informed of the different building phases and how it all comes together!
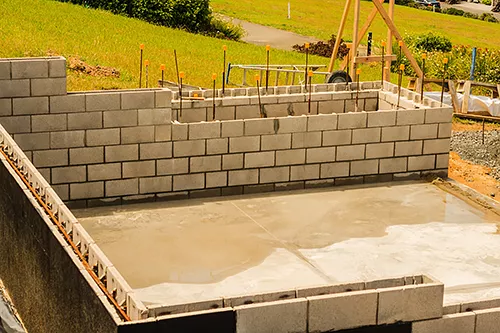
Your home’s foundation is a critical element in the building process because it supports the entire structure. Constructed correctly, it ensures your home’s safety and efficiency. After your lot is cleared and excavated, forms are built with framing lumber (that you can clean and reuse for framing) and concrete is then poured into each section. Most foundations are either basement, slab, or crawlspace and your builder can help decide which is right for you.
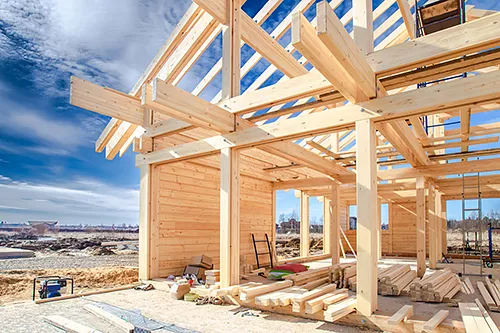
After the foundation is poured and set, the form boards are removed and framing of the house begins. Just as our skeleton serves as the structure for our bodies, the frame of a house is the underlying structure of the home. As the framing progresses, you will see the layout of your home unfold, and you’ll be able to identify different rooms, doorways, and windows. If your home seems smaller than you imagined at this point, don’t panic. It’s
simply an illusion!

Inspections are a very important part of the home construction process and ensure that every element of construction is done correctly. After the initial inspections, your builder will ask you to walk through your home. At this point you can visualize what your dream home will basically look like because the walls and trusses will be framed, and the roof sheathing will be installed.
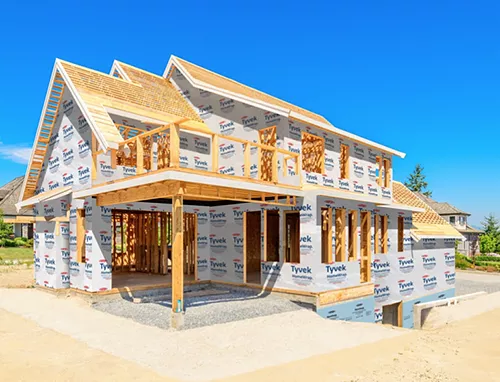
Certain climates have a higher risk of moisture damage, which can cause mold and wood rot. Therefore, a protective barrier known as house wrap is installed to prevent the structure of your home and its interior from getting wet, growing mold, or rotting. The house wrap ensures that all moisture will remain outside of the home.
Once framing has passed inspection, your builder will begin enclosing your home and install siding, shingles, the roofing system, any brick or stone details your interior or exterior design requires, and the windows and doors. Windows, doors, and skylights are very visible features of your home both inside and out, so choose and invest wisely!
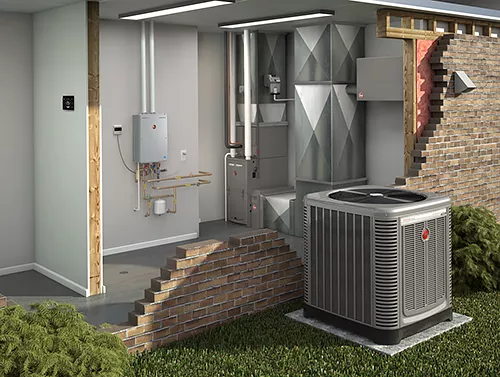
This stage is critical and occurs before the installation of sheetrock. This is the building stage where mechanical components and wiring are installed. Venting, ductwork, water heaters, and the HVAC system are also installed.
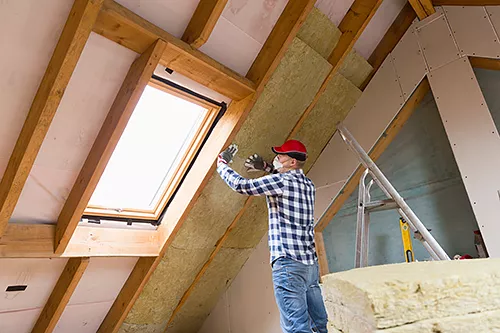
Insulation is an important factor that determines your home’s energy and cost efficiency. When installed adequately and properly in the floors, walls, and ceilings, this relatively inexpensive product can save money and conserve energy by preventing heat and A/C from escaping your home.
Our architects prefer Pella® Windows for stunning, energy-efficient, and durable windows that stand the test of time. For garage doors, the top choice among architects and customers is Clopay® and Therma-Tru® is preferred for entry and patio doors.
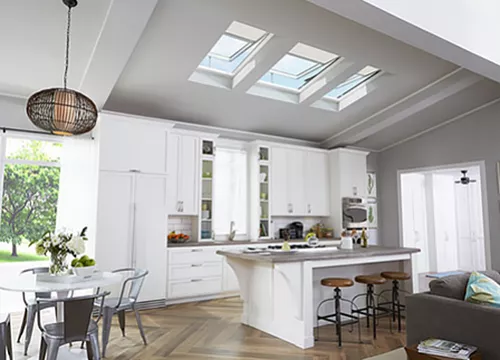
To maximize natural light and fresh air in your interior, VELUX® makes reliable and gorgeous skylights and roof windows. And for authentic, natural-looking stone and brick veneer, our architects recommend Eldorado Stone because each piece is literally hand-painted by highly trained artisans to offer a unique and authentic finished look.
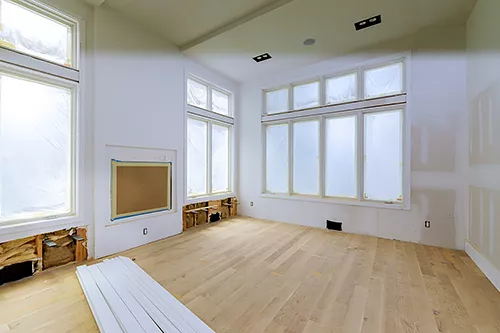
Once the home is framed and wrapped and the mechanicals have been installed, the sheetrock is put in place to form the walls. Now you can see your new home coming to life!
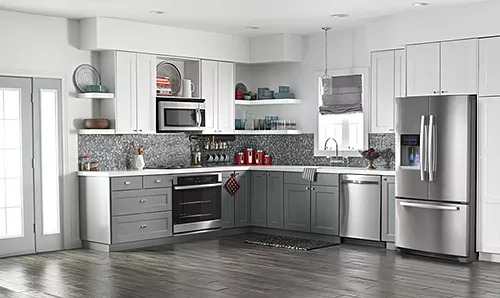
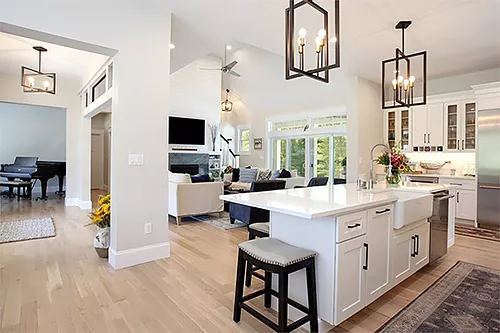
One of the most exciting stages of building a new home is selecting all the products that go into each room. This includes flooring, cabinets, countertops, appliances, lighting fixtures, millwork and trim, interior doors, plumbing products, and much more. Check out our Architect Preferred appliances by Whirlpool®, KitchenAid®, JennAir® and Maytag®. Don’t forget to visit the Product Ideas section of TheHouseDesigners.com for useful product information and great building tips!
The final walk-through is the last step before you move into your beautiful new home. Turn on all appliances, lights, the HVAC system, faucets and showers, and flush toilets and check electric outlets. Check to see that all your cabinets, doors, and windows open, close, and lock properly. Also make sure there aren’t any major defects like cracks, scratches, and/or gaps in the floors. If there are any issues, this is the time to notify your builder and have everything resolved before closing on your home.
CONTACT US AND LET US HELP YOU
FIND YOUR DREAM HOME


