SAVE $100 

It is not the easiest home project to tackle, but if you are relatively handy and patient (it will probably take a few solid weekends to complete) you can probably lay down a new solid hardwood floor in your home if you select a prefinished product. This eliminates the extra work and expertise of sanding, staining and finishing your new floor.
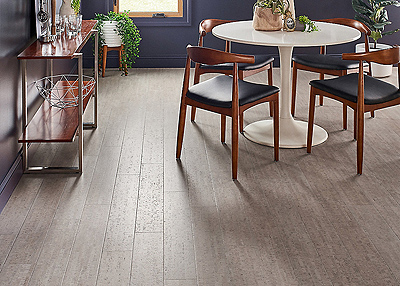
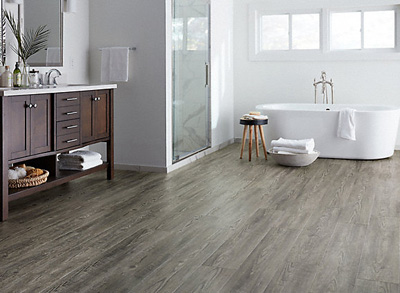
Step 1: The first step is to choose the type of hardwood flooring you want. You can choose from prefinished, laminated (also called engineered) strips and planks made from either solid wood or thin plywood. Prefinished floors come in a variety of stain colors and thickness with tongue and groove edges. If you are installing a new floor you'll want to go with a 3/4-inch thickness unless it's going over an existing floor, than you can select a low-profile style that is much thinner and will greatly decrease the cost. Keep in mind that solid wood floors are not recommended for basements or below grade.
Step 2: Next you'll need to figure out how much flooring you need to order. Simply measure the width and length of the room and multiply the two numbers to get the total square footage. Remember to order an extra 10% for cutting, fitting and repairs down the road, because you if have to reorder you may not get an exact match.
Make sure that you leave the flooring stacked in the room where you'll be installing it for at least two weeks prior to installation so the wood can adapt to your home's temperature. Proper acclimation helps reduce board movement, excessive squeaks and gaps after installation.

Step 3: It's relatively easy to prep your sub-floor since prefinished hardwood flooring can be installed over old wood flooring or over a plywood sub-floor. You'll want to attach a substrate to the floor joists using wood or drywall screws to eliminate any squeaks in the floor. Make sure your floor is completely clean, because even the smallest bump can cause your floor to be unlevel.
Step 4: To help fight moisture and reduce squeaks, you'll want to install a vapor barrier between the flooring and sub-flooring. It's recommended that you use 15 lb. black roofing paper to provide some protection against moisture vapor or red rosin paper if moisture isn't a concern. Simply roll out the paper, flatten it and attach to the sub-floor using a heavy-duty staple gun.
Step 5: When it comes to deciding how to layout your floor, there are two basic rules of thumb depending on the look and style you want to achieve. Most hardwood flooring manufacturers recommend that you install hardwood flooring across the floor joists (perpendicular) for added stability and reinforcement, however longer rows of flooring tend to be more attractive and easier to install. Be sure to mark the location of each floor joists with a chalk line (they are typically 16 inches apart) and to leave a gap of about ½ inch from the wall, since wood floors will expand and contract (solid hardwood may need a wider gap so check with the manufacturer).

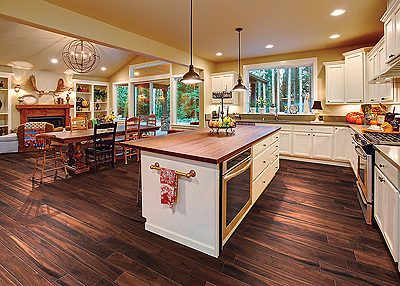
Step 6: When it comes to installing your floor you'll want work in small boxes by laying out rows of loose boards or planks across the length of the floor. You'll want to have several bundles opened so that you can mix and match lengths, wood-grain patterns and variation in color to create a cohesive design.
Your first and last row will be your most challenging because they need to be top nailed. When top nailing pre-finished wood it is recommended to pre-drill and hand nail so you don't damage the wood surface and finishes. All other rows of tongue and groove can be locked in (it's a good idea to have a mallet at hand to ensure there is no gap between each row) and then nailed with a power nailer. You want to maker sure that you have at least two nails in every board. Try to avoid cutting boards to fit unless absolutely necessary (another reason for buying extra boxes).
Another way to install a floor is the glue down method or floating floor option where the tongue and grooves are glued and the floor literally sits on top of the subfloor.
Step 7: Now it's time for the finishing touches. It's a good idea to have lots of natural light available to inspect your floor for minor marks and nail holes that you can fill with wood putty. Most prefinished manufacturers offer a line of touch-up products that match each floor. Some even offer matching base moulding so you can complete your project without ever picking up a paintbrush.